Making a Homenet router out of OpenWrt
This post provides a step-by-step guide on how to take a residential gateway running OpenWrt, installing the software from the Hnet project on it, and finally converting it to be a full-fledged Homenet router. The post is quite long, but don’t let that put you off - it’s only because I go through the process in minute detail. The entire conversion process shouldn’t take you more than 10-15 minutes.
Unlike the Hnet project’s own setup instructions, I’ll use only the OpenWrt web interface LuCI, and provide plenty of screenshots. That way I’m hoping to help make Hnet and Homenet a little bit more accessible to users who might not be too comfortable working with OpenWrt’s command line interface.
If you don’t know what Homenet is or why you would want your residential gateway to be a Homenet router in first place, I suggest you go read my previous post, where I introduced Homenet.
Prerequisites
First of all, you’ll need a residential gateway with OpenWrt 15.05 Chaos Calmer installed. Consult OpenWrt’s Table of Hardware to check if your device is supported. The device page linked from the table should contain installation instructions. The router I’ll be using in this walk-through is a Netgear WNDR3700v2.
Second, I recommend that you use a laptop with both wired and wireless connectivity. That way, you can safely reconfigure the router’s wired ports while connected with wireless and vice versa, thus greatly reducing the risk of inadvertently locking yourself out of your device. While it’s certainly possible to make do without, the following instructions will assume that you’re using such a laptop.
If you end up locking yourself out of your device anyway, look for a physical button labelled Reset or something similar. You can usually make the router revert to its default configuration by keeping it pressed for 10-15 seconds. If that doesn’t work out for you, consult the documentation on OpenWrt’s failsafe mode.
The home network: bridged or routed?
Like most residential gateways, OpenWrt comes by default with a single logical LAN interface which is just a layer-2 bridge consisting of all the wired and wireless interfaces in the router, excluding the WAN interface. That is however not how a Homenet router is meant to operate. In Homenet, layer-3 is king: each interface has its own isolated network segment, complete with its own IP prefixes. Standard layer-3 routing is used whenever hosts on different segments need to communicate.
In this guide, I’ll set it up the proper Homenet way. That said, a Homenet router also supports traditional bridged LAN segments. This approach can be used if you want to keep full layer-2 connectivity between all the hosts in your home network.
Step 1: Install the Hnet software suite
OpenWrt 15.05 Chaos Calmer doesn’t come with the Hnet software installed by default, so our first order of business is to install it from the Internet. Connect your router’s WAN port to an Internet-connected network (such as directly to your ISP or your pre-existing home LAN), and connect your laptop to one of the router’s LAN ports using wired Ethernet. You should now be able to access LuCI, OpenWrt’s web interface, at http://openwrt.lan:
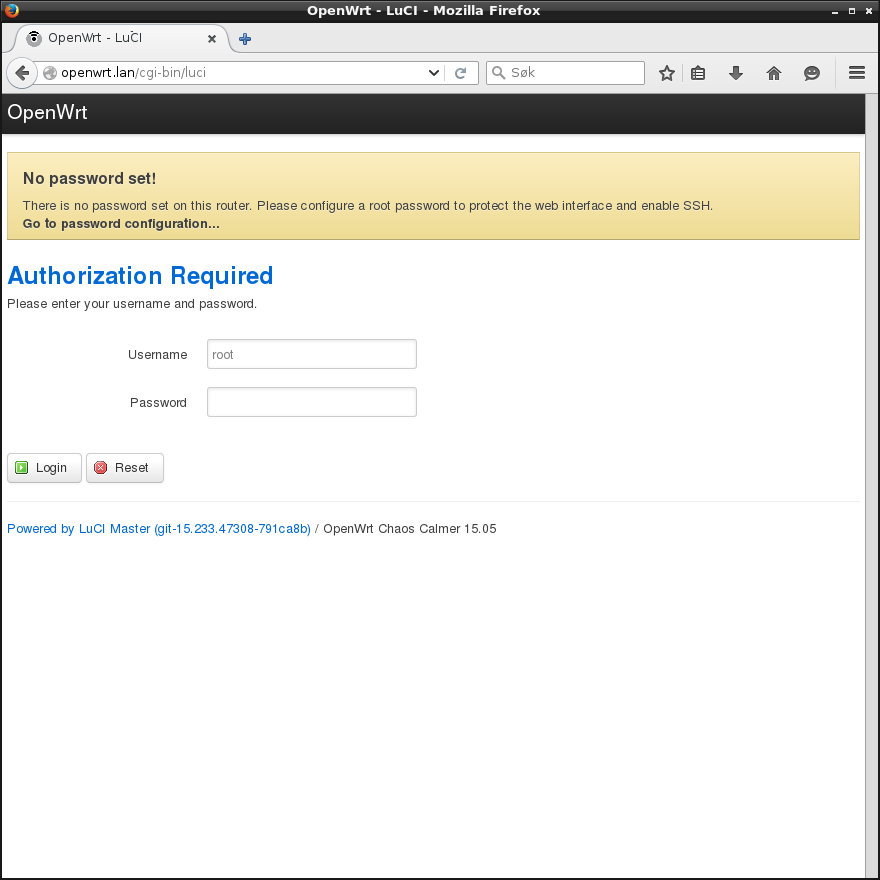
Log in as root without a password. It will take you to LuCI’s
Status/Overview page:
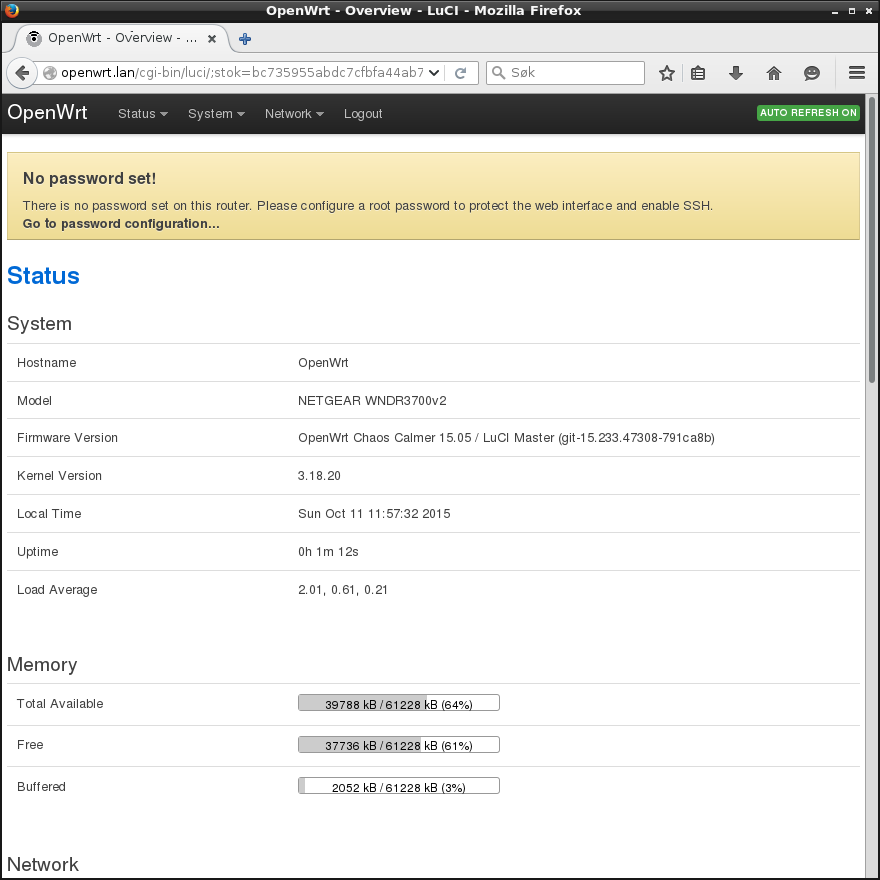
It insists that you set a password. This can be done on the System/Administration page.
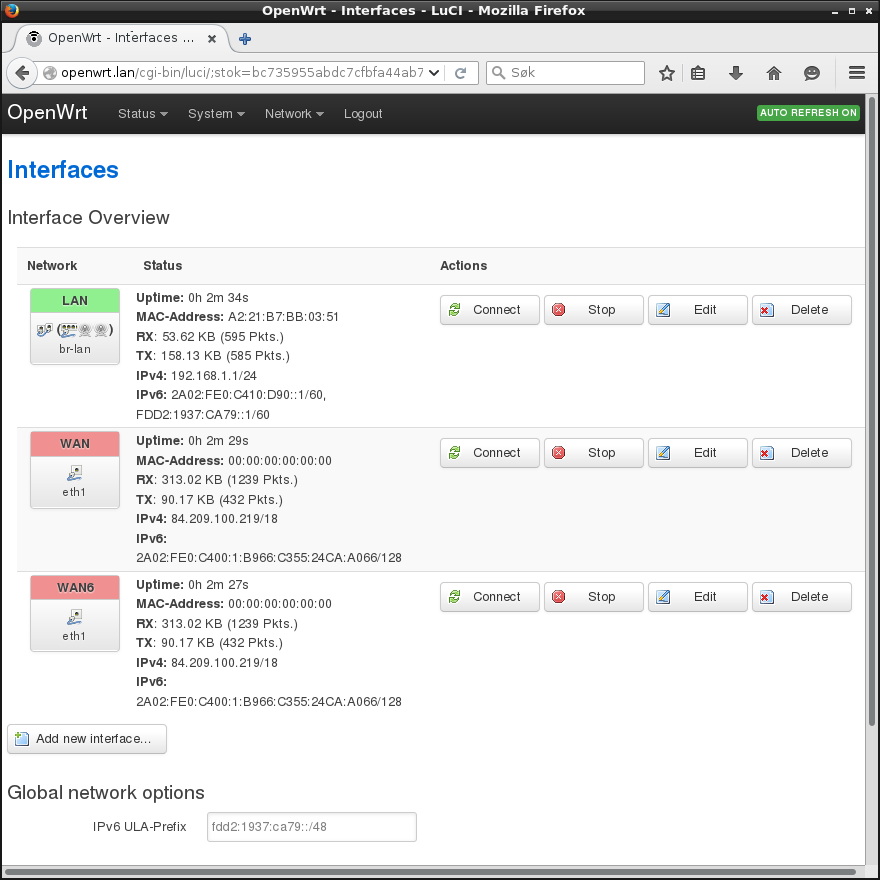
If you want, you can now visit Network/Interfaces to verify that the router’s WAN interface has been automatically configured:
Head to System/Software and click the Update lists button to refresh the list of software available for download:
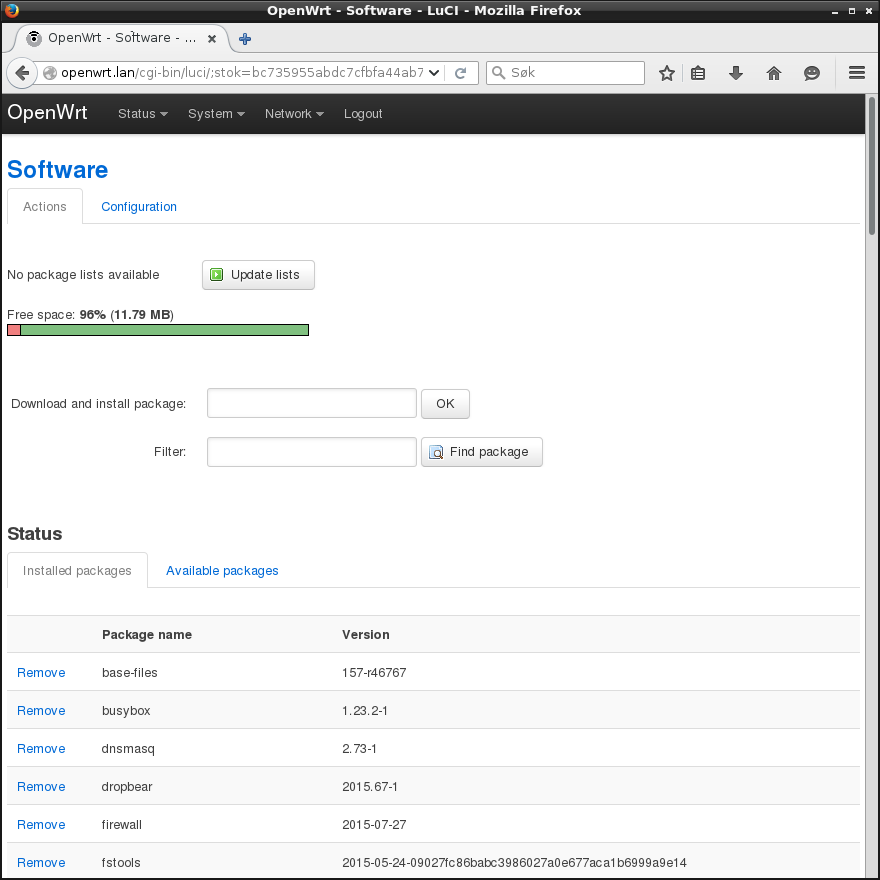
When that has completed, download and install the ipset package and then
hnet-full. (I’m not 100% certain that ipset is strictly necessary, but
you’ll get a warning when installing hnet-full if ipset isn’t already
installed.)

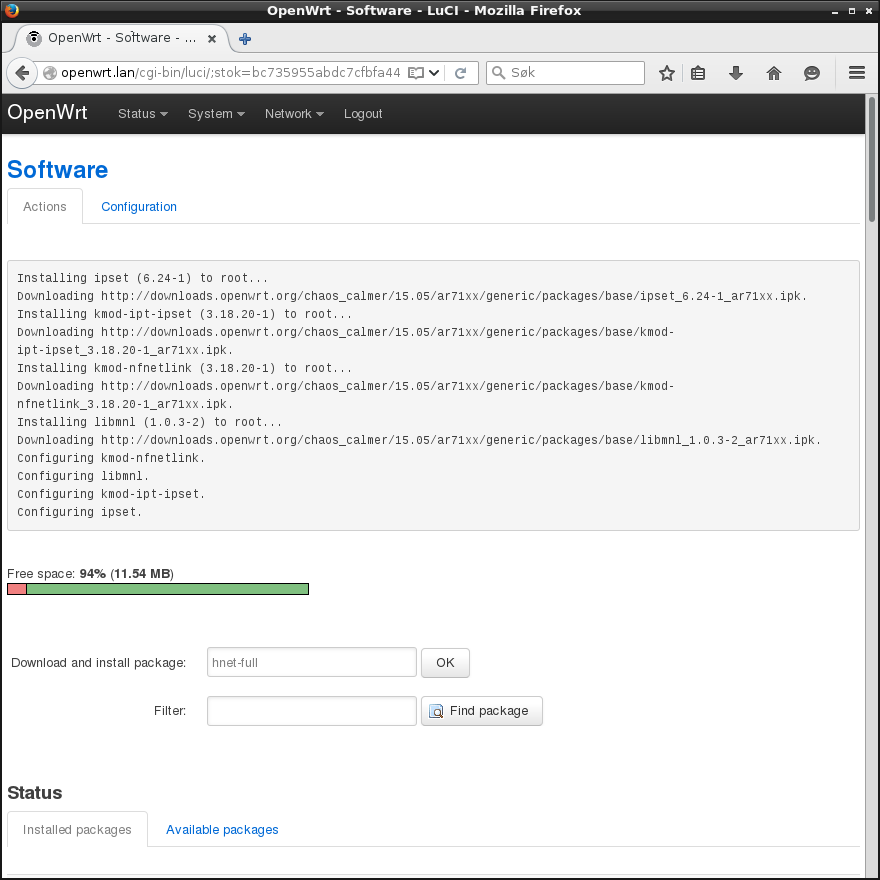
After the installation of hnet-full, all the software necessary for Homenet
operation is installed. It is now necessary to reboot the router in order for
the software to become fully operational (this is probably a bug). You can do
so from the
System/Reboot page.
Step 2: Disable the non-Homenet ULA prefix handling
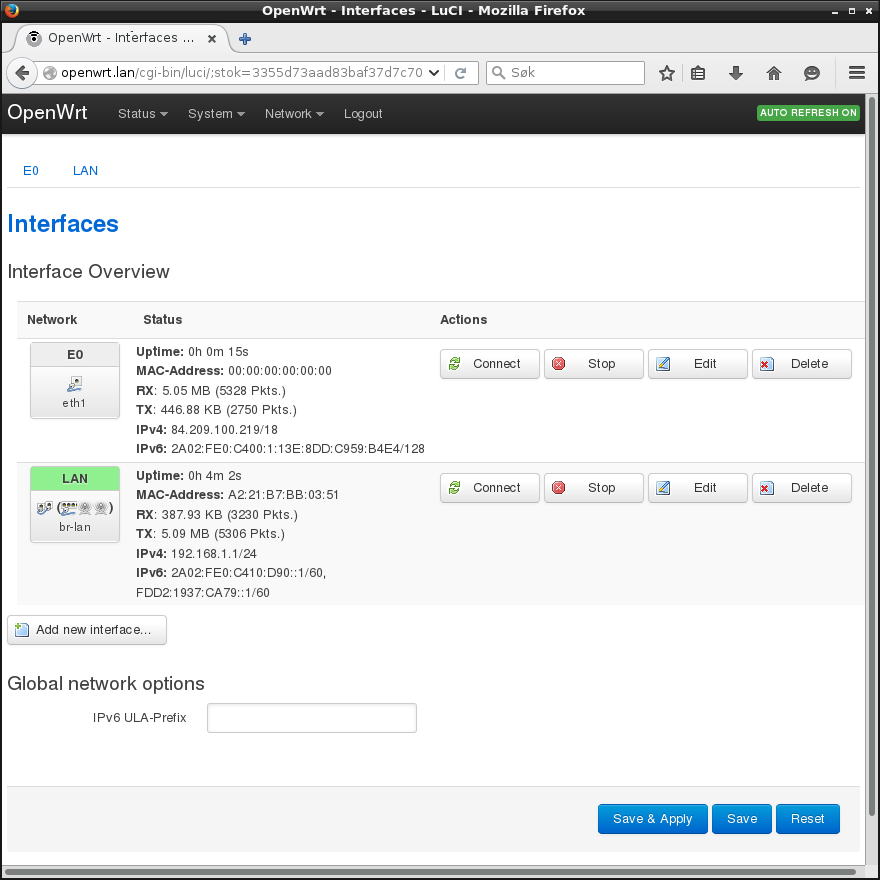
After the reboot, head to Network/Interfaces. Near the bottom of the page there’s a text field labelled IPv6 ULA-Prefix that contains an auto-generated prefix. Empty this text field and then click Save & Apply:
Why is this necessary? Hnet generates and maintains its own ULA prefixes independently of the IPv6 ULA-Prefix setting. However, due to a bug, Homenet interfaces created in LuCI will end up with two ULA prefixes assigned; the native Homenet-maintained one in addition to the non-Homenet one specified in IPv6 ULA-Prefix. Removing the non-Homenet setting successfully works around this bug.
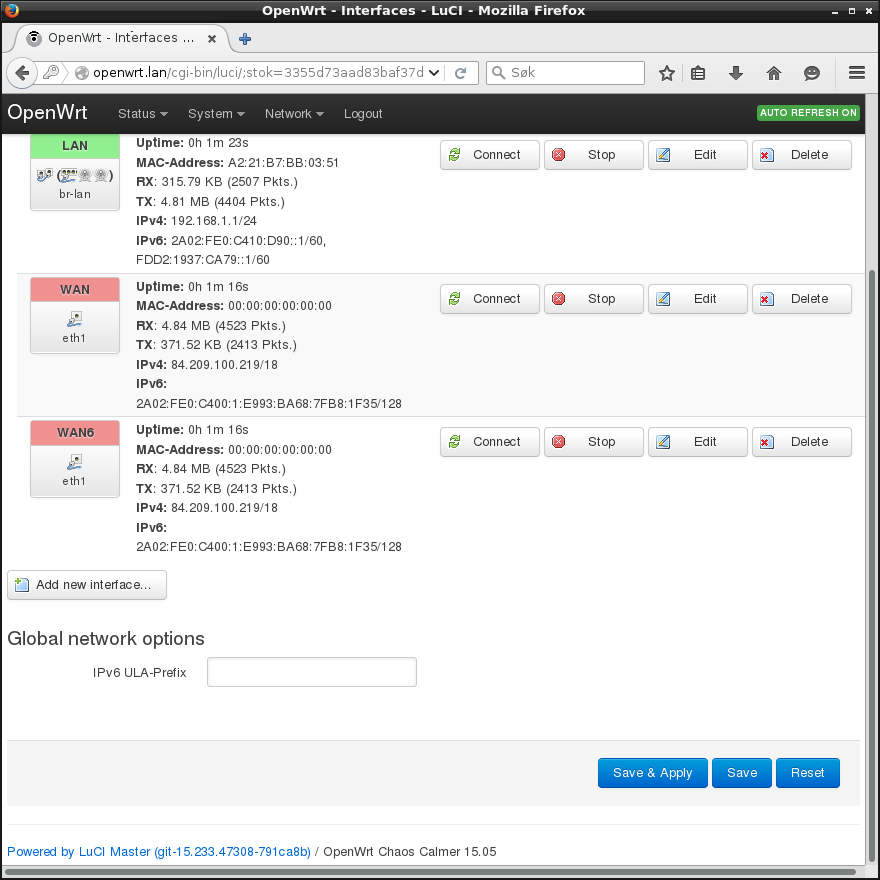
Step 3: Convert the WAN interface to Homenet
Stay on the Network/Interfaces page and make a note of which physical port the default WAN and WAN6 interfaces are using (eth1 in my case), then click their Delete buttons to remove them. You should now be left only with the default non-Homenet LAN interface:
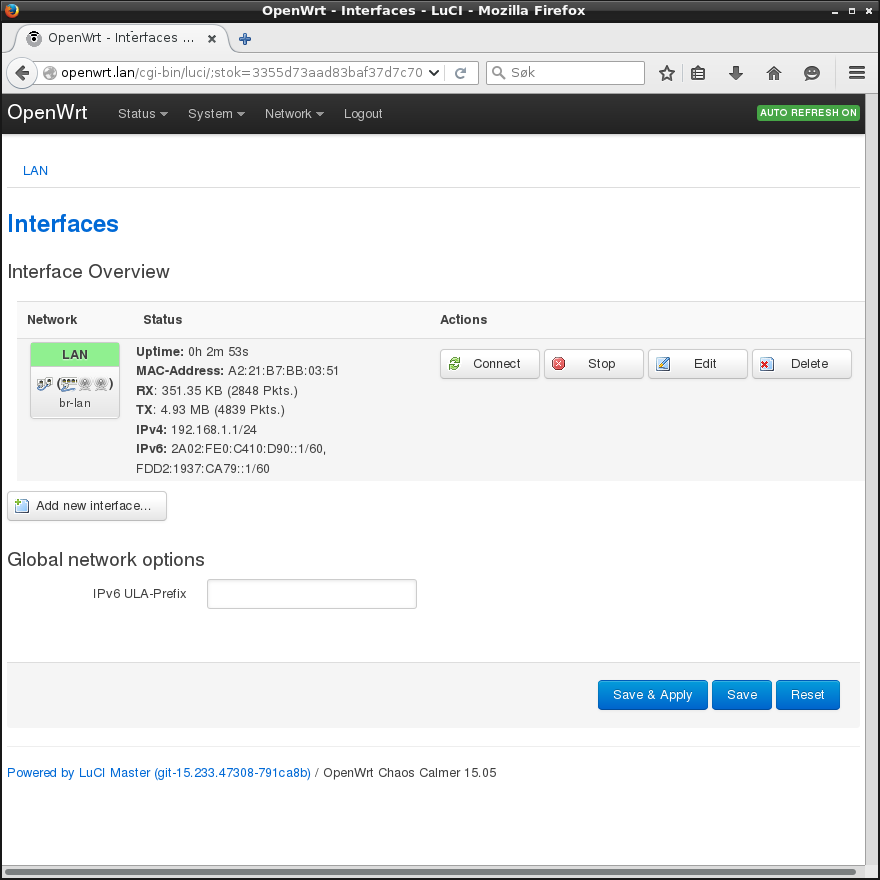
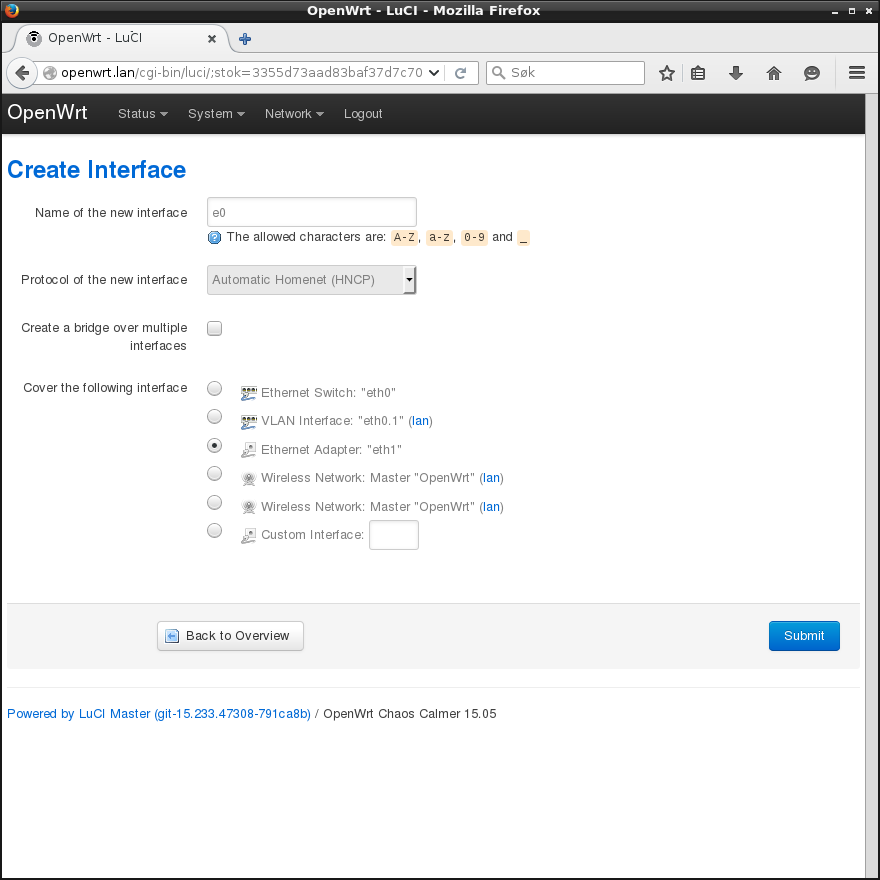
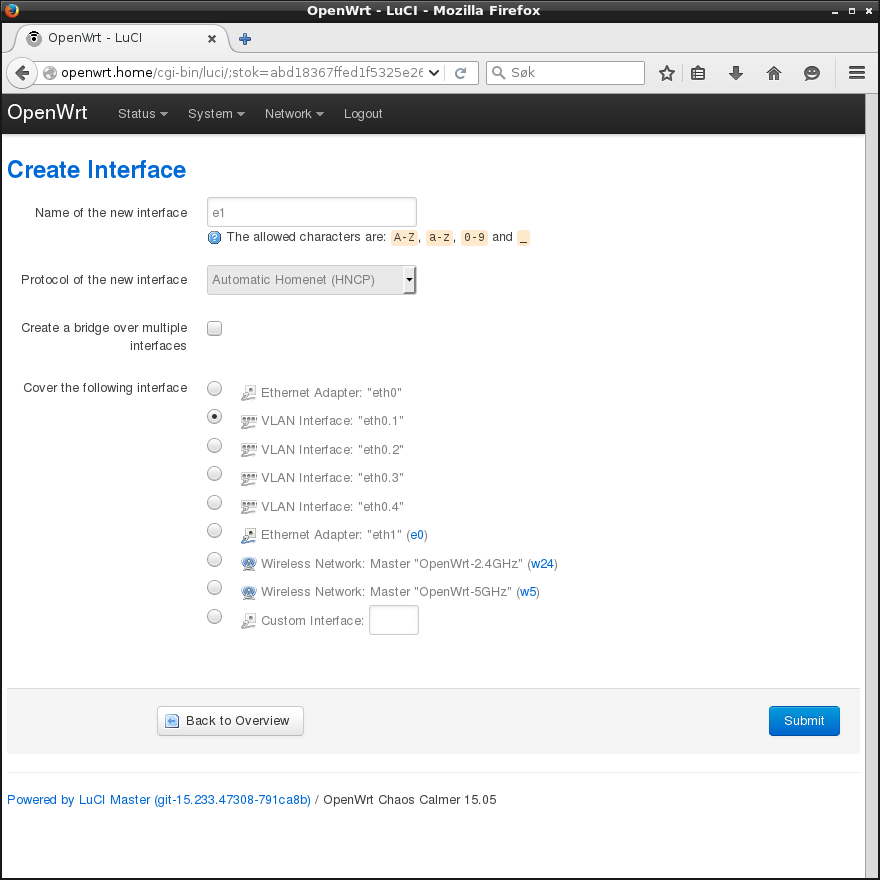
Once they’re gone, click Add new interface…. You can give it any name you want, except for LAN, WAN, or WAN6. Hnet will automatically detect the role of an interface as long as it does not have any of those special names. (I’m calling mine e0, short for Ethernet port 0.) Choose the protocol Automatic Homenet (HNCP), set it to cover the same physical interface as the old WAN/WAN6 interface did, and finally click Submit and then Save & Apply.
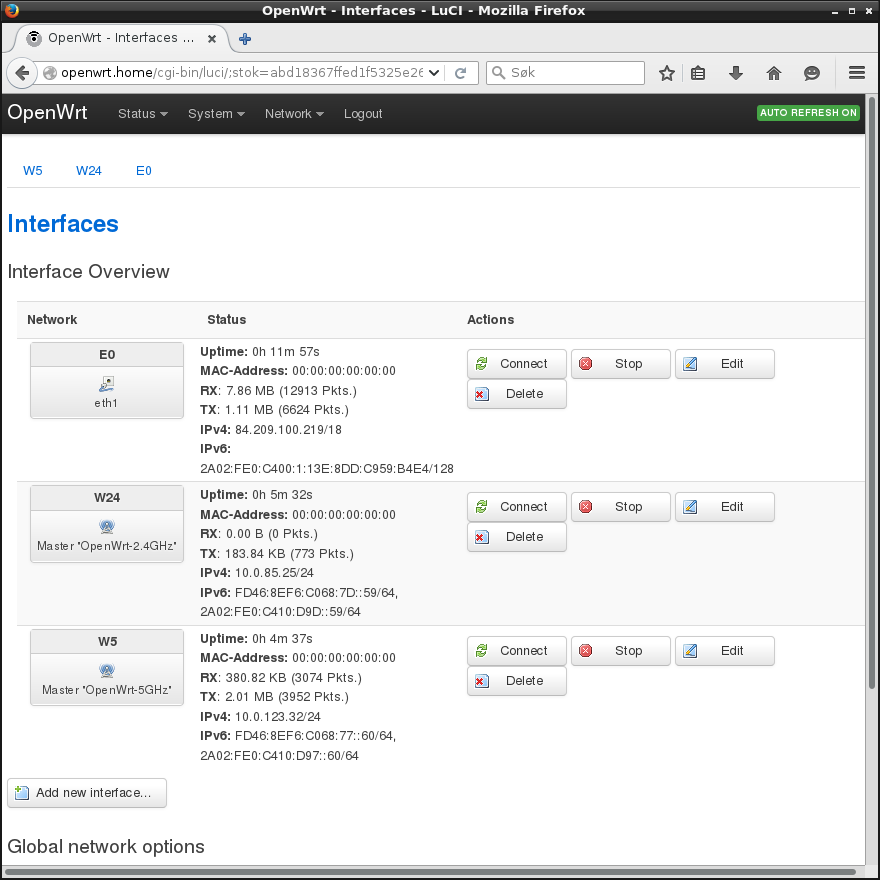
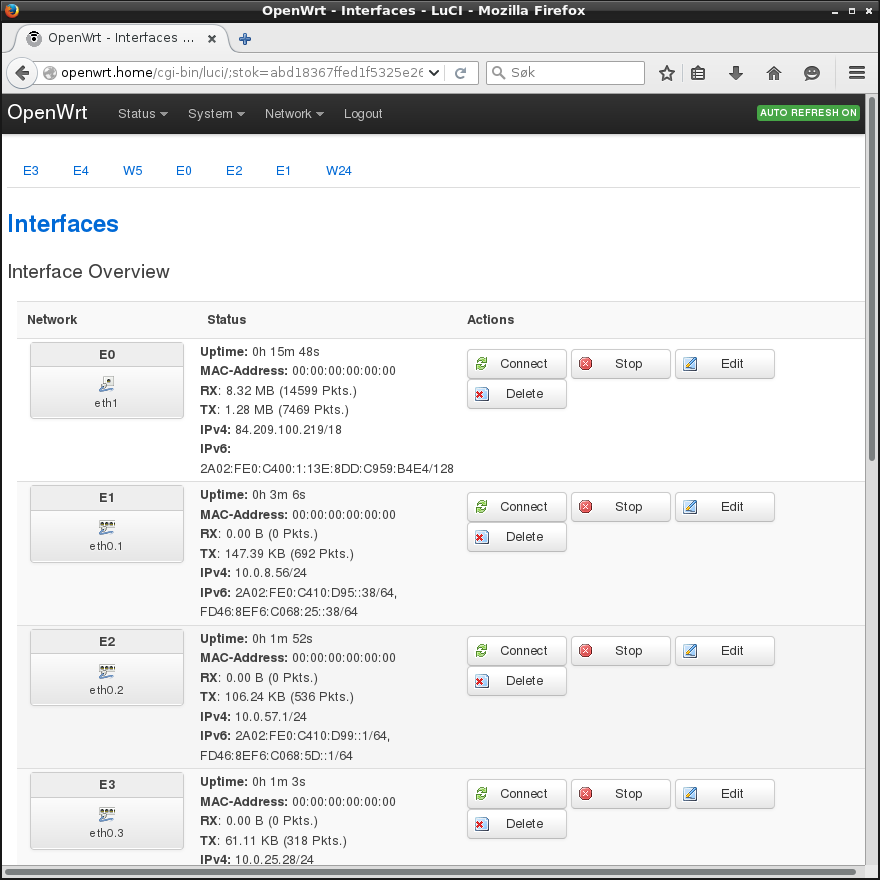
If everything went well, you should be returned to the interface list, and after a few seconds your new Homenet interface should show as having acquired connectivity from the upstream network:
Step 4: Convert the wireless interfaces to Homenet
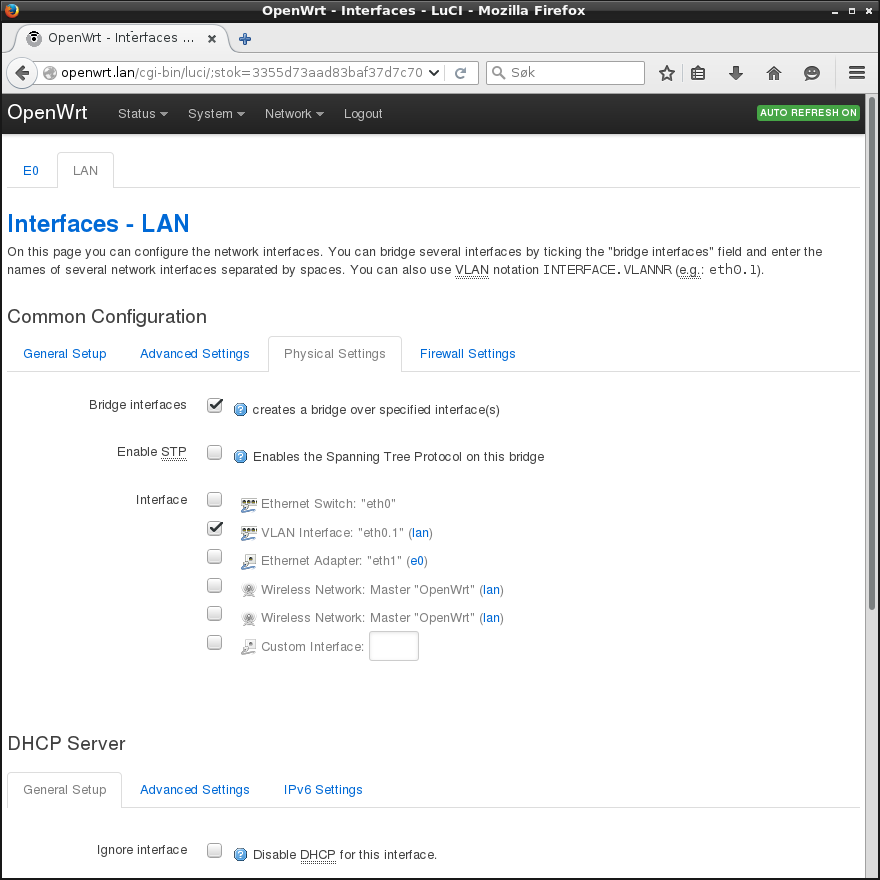
We’ll first need to remove the wireless interfaces from the default non-Homenet LAN bridge. Hit Edit on the row with the LAN interface, and go to the Physical Settings tab. Remove the tick in the checkbox next to any wireless interface you see, and click Save & Apply.
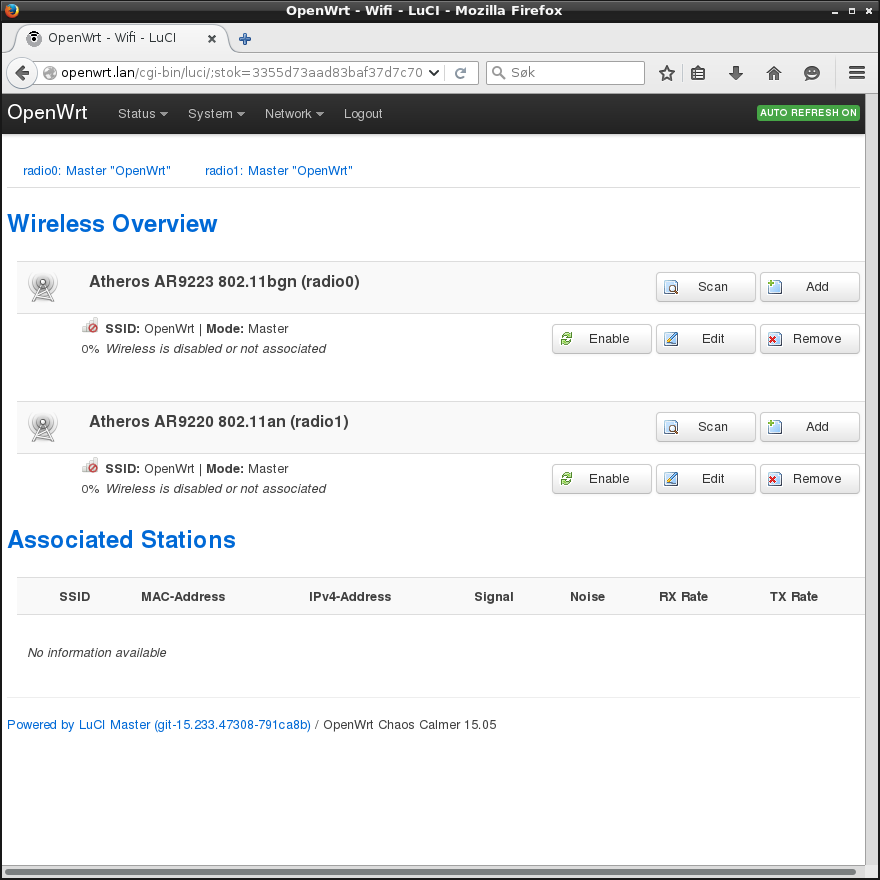
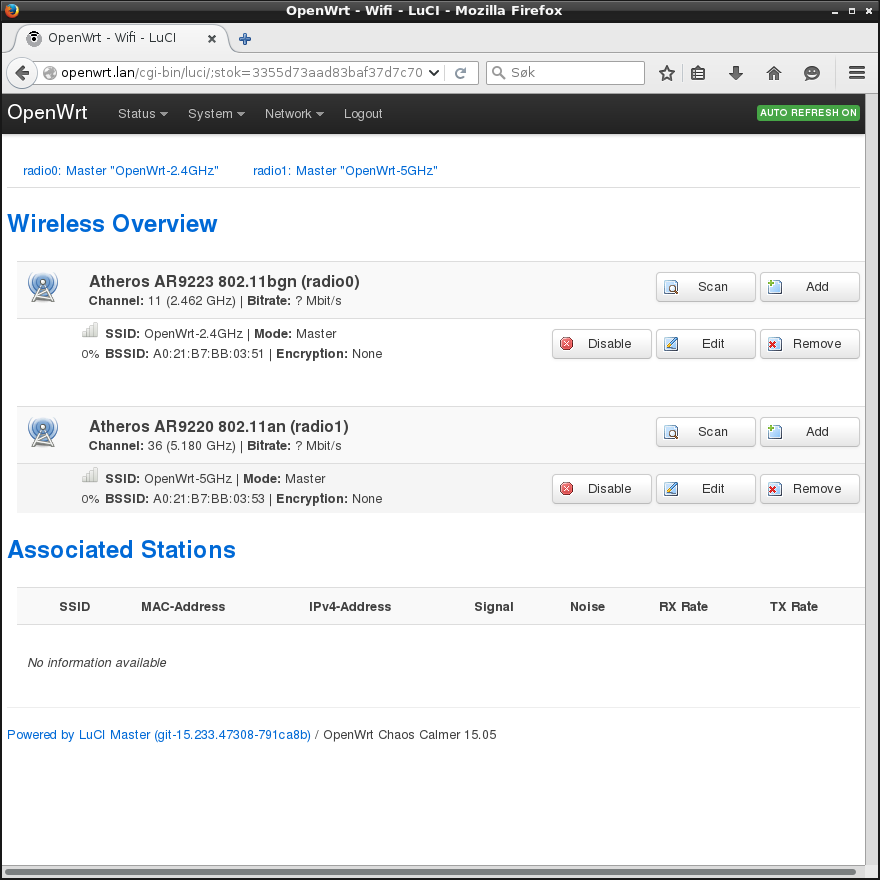
Next, head to Network/Wifi to see the list of wireless interfaces:
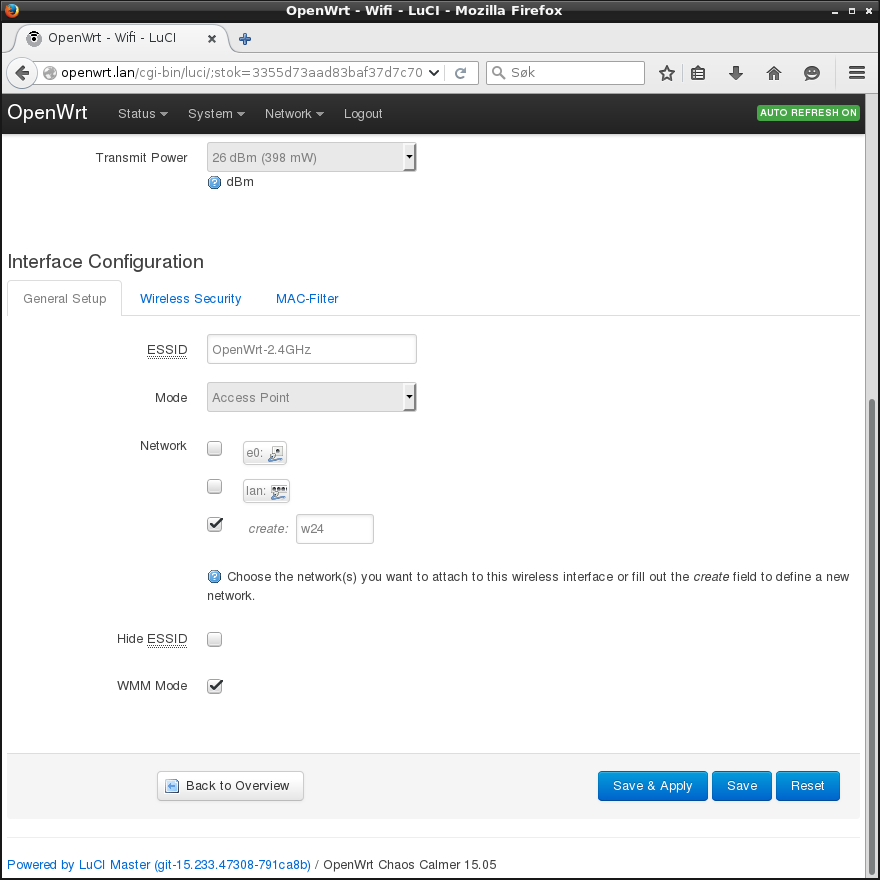
Click the Edit button for one of the wireless interfaces, tick the checkbox next to create: and give the new interface a name. You can use any name you want, except for LAN/WAN/WAN6 as discussed above. You might also want to take some time to explore the various tabs here in order to configure security and encryption, wireless band and channel, country, and so on.
If your device has multiple wireless interfaces, I strongly suggest that you also give them different ESSIDs. This is because most wireless clients will assume that all access points using the same ESSID connect to the same layer-2 segment. That’s not the case in Homenet, so if a client roams from one AP to another, it might experience connectivity issues. Using differing ESSIDs will prevent this from occurring.
When you’re happy with the setup, click Save & Apply. Repeat the process for all the wireless interfaces in the list. The final step is to click each interface’s Enable button in the interface list to turn on the radio:
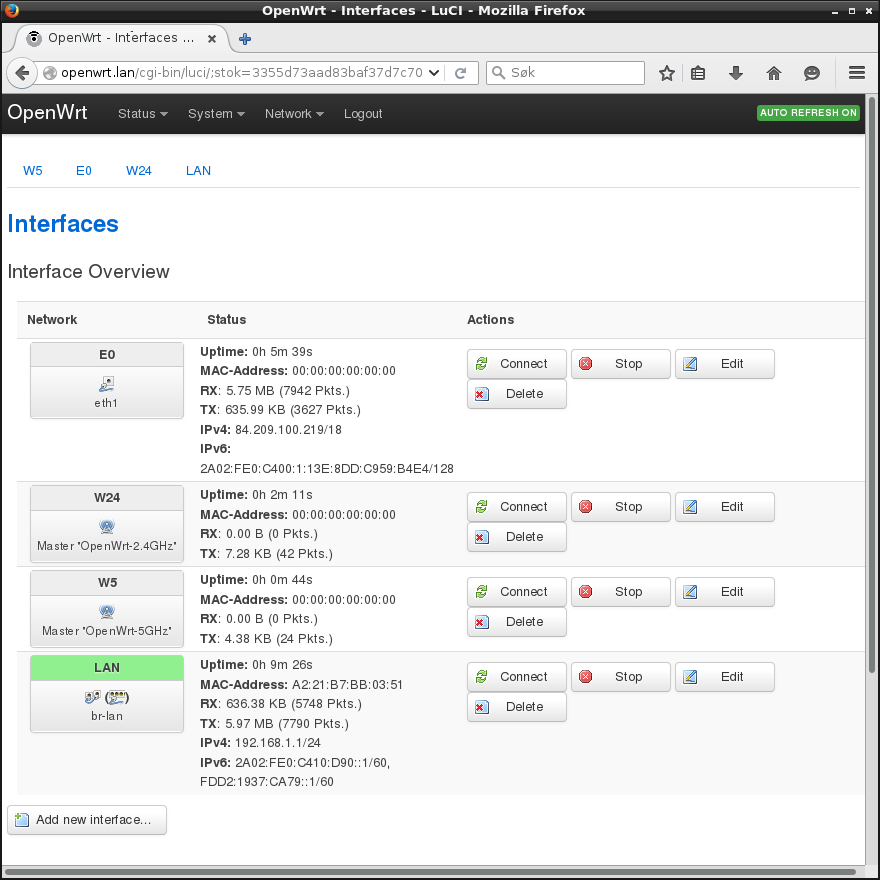
Head back to Network/Interfaces. You should see the new wireless interfaces in the list:
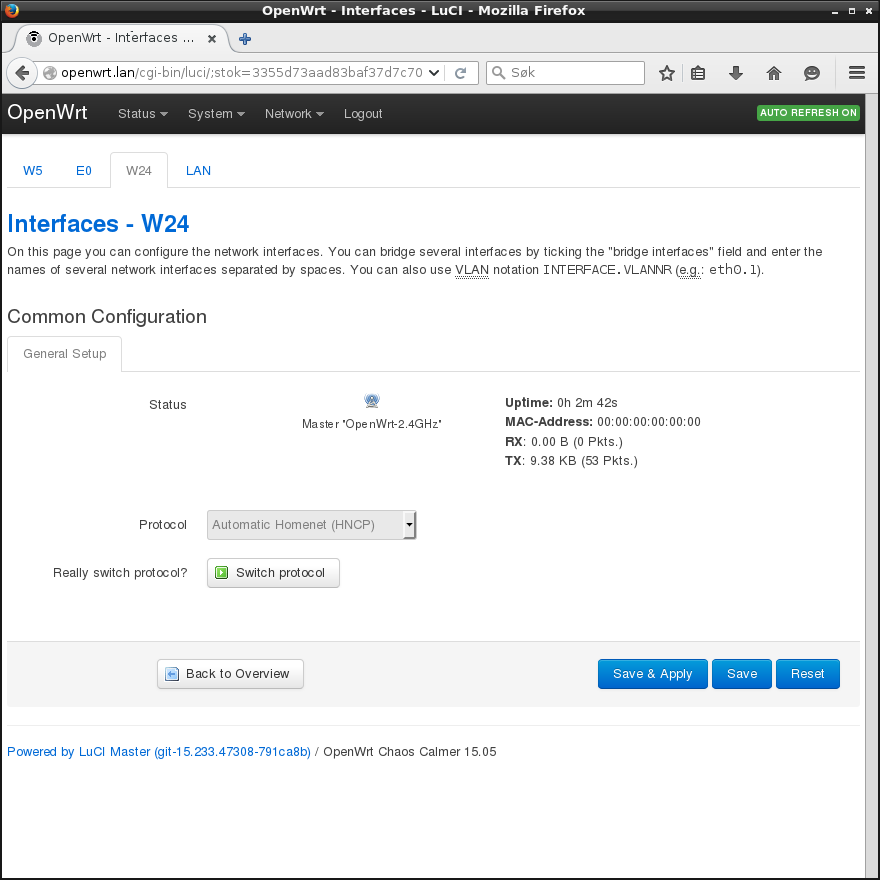
Click Edit for one of them. On the next page, set the protocol to Automatic Homenet (HNCP) and click Switch protocol and then Save & Apply.
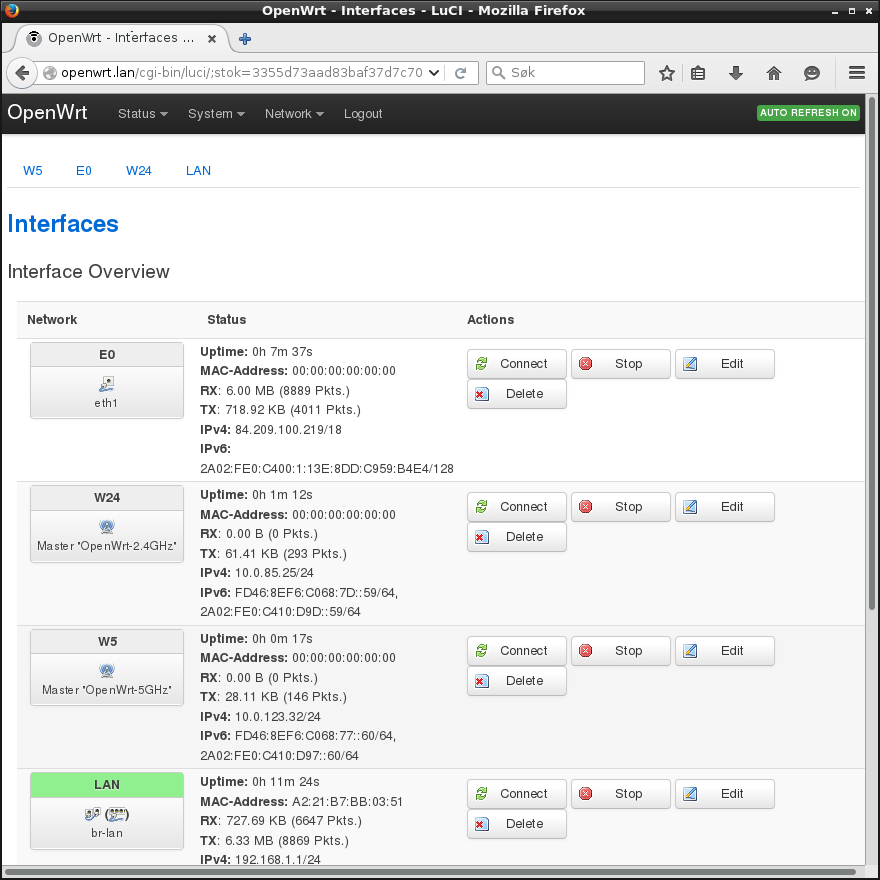
Repeat the process for any other wireless interfaces in the list. When you’re done, the interfaces should all have been configured with IP addresses:
At this point, disconnect your laptop’s Ethernet cable and connect to one of the ESSIDs you just created. If it works, congratulations! Your laptop is now connected to a Homenet-handled network segment. From now on you’ll need to access LuCI at http://openwrt.home (note that the domain suffix has changed).
Step 5: Create per-port VLANs in the embedded switch
(If you’re going for a traditional bridged layer-2 home network, you can skip this section.)
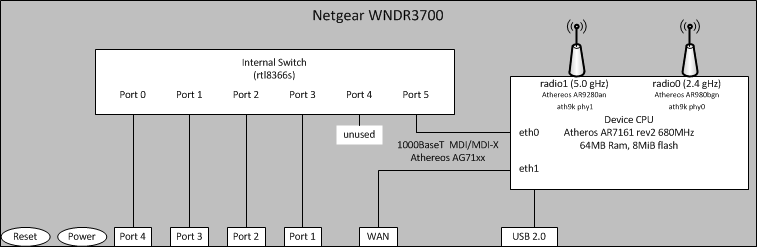
The external LAN ports on my router are connected to an embedded Ethernet switch, which in turn has a single interface connected to the “CPU” where OpenWrt runs. The following figure from the OpenWrt Wiki illustrates the architecture:
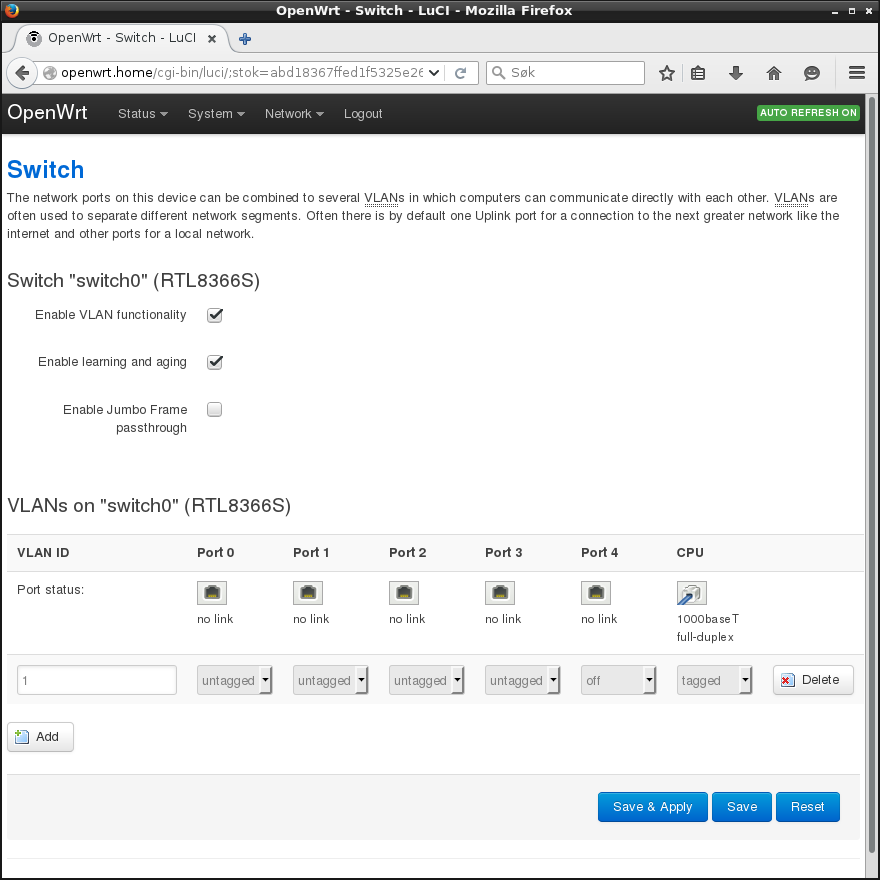
I’ll use VLANs to make each of the four external LAN ports their own Homenet interface. This is done on the Network/Switch page. My WNDR3700v2’s default configuration contains only a single VLAN:
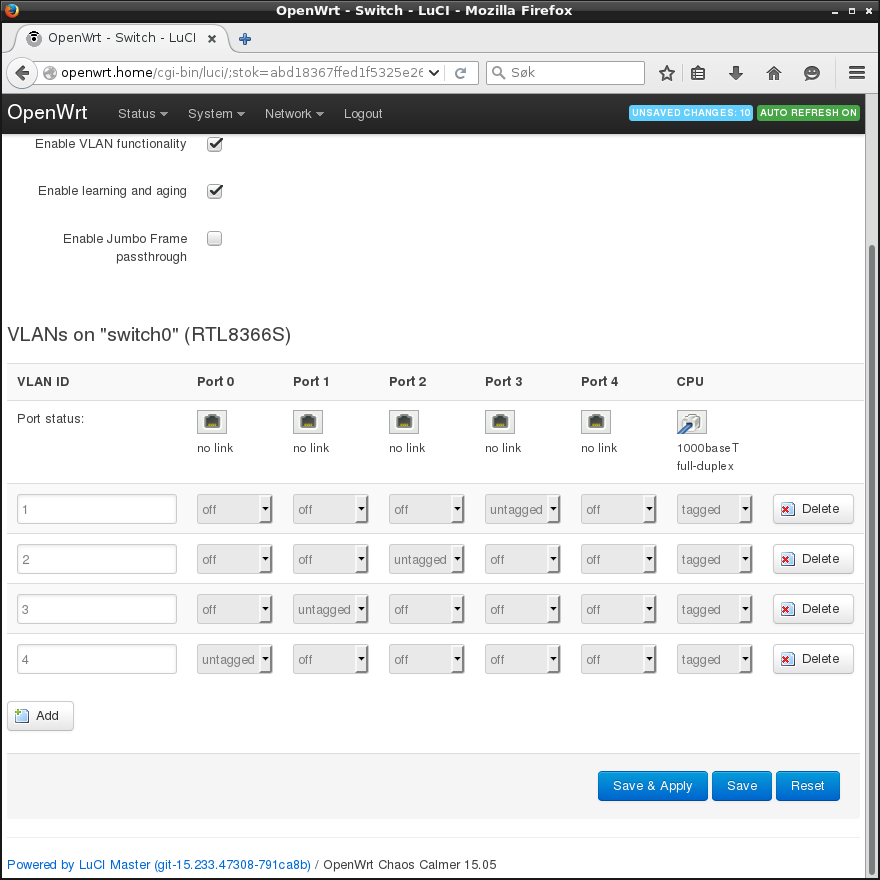
My new configuration consists of four VLANs, one for each external LAN port. Each of the VLANs is set up as untagged for its associated external LAN port, tagged for the CPU port, and off for all other ports. I’ve opted to give each VLAN the same ID as the number of its associated external LAN port, but this is just a matter of preference - at the end of the day, it doesn’t matter which values the VLAN IDs are set to. When you’re happy, click Save & Apply.
Step 5: Create Homenet interfaces for the LAN ports
Return to Network/Interfaces. Delete the old LAN interface the same way you did with WAN and WAN6. Now you should only be left with the new Homenet interfaces you’ve created so far:
What now remains to be done is to create Homenet interfaces for each of the VLANs in the switch. This is done in the same way I created the e0 interface earlier; first, click Add new interface…. In the next view, give it a name of your liking (except LAN/WAN/WAN6), choose the Automatic Homenet (HNCP) protocol, set it to cover one of the VLAN interfaces you just created, and click Submit and then Save & Apply.
Repeat this procedure for each of the VLANs configured in the embedded switch. When you’re done, the list on the Network/Interfaces should look something like this:

Mission accomplished!
Congratulations! Your router is now a pure Homenet router. Head to Status/Homenet to see a dynamically updated graph of your Homenet topology:

Of course, with only a single Homenet router this graph isn’t extremely interesting, but at least it should show your router, its interfaces, and any IP prefixes it has been assigned. You can click on various nodes in the graph to get more details in JSON format.
If you followed my advice on interface naming, your router’s interfaces should no longer have pre-determined roles such as WAN or LAN. You may, for example, connect your upstream Internet connection to the port labelled LAN 3 and a regular host to the port labelled WAN - it will work just as fine as the other way around. This ability alone will give Homenet an unprecedented level of «plug&play-ness» compared to the regular residential gateways in sale today.
If you own several residential gateways supported by OpenWrt, try converting them all to Homenet routers and connect them to each other in arbitrary ways - including via wireless. They’ll automatically discover each other and form a coherent network topology, which the Status/Homenet graph will reflect in seconds. I’ve tried this and it Just Works. Good-bye, IPv4 NAT stacking and DHCPv6-PD cascading! You shall not be missed. That said, hosts or non-Homenet routers connecting to the Homenet will be granted a DHCPv6 Prefix Delegation if they ask for one.
It is also possible to connect your Homenet to multiple ISPs, and it should all
Just Work, even if the ISPs are connected to different Homenet routers.
Well, in theory anyway - I haven’t yet tested Homenet with multiple ISPs
myself. If you do, please let me know how it worked out. You can reach me and
the Hnet team itself at #hnet-hackers at freenode.